Skip to content →

Category: Projects & Toys

Here are the projects I’ve participated in, and some toys I wrote.

URL Decoding

The charset of the form page is ISO-8859-15'. HTTP will encode the form message in URLEncoding, that is, space is replaced with +’; non-ASCII characters are encoded inthe format %XX', where XX’ stands for the hexadecimal value of the character.

The URL decoder in this system looks as follows:

importjava.io.UnsupportedEncodingException;
import java.util.Vector;
import java.util.logging.Level;
import java.util.logging.Logger;

/**
 * UrlDecoder decodes URL encoded information into quoted printable characters.
 * 
 * @author Daoyuan Li
 */
public class UrlDecoder {

    /**
     * Decode from URL encoding to quoted printable.
     * @param url URL encoded message to be decoded.
     * @return Decoded quoted printable string.
     * @throwsException If anything wrong happens, an Exception is thrown.
     */
    public String decode(String url) throws Exception {
        String decoded = "";
        Exception ex = new Exception();
        Vector buf = new Vector();
        for (int i = 0; i < url.length(); i++) {
            if (url.charAt(i) == '%') {
                if (i + 2 >= url.length()) {
                    throw ex;
                }

                int d = -1;
try {
                    d = Integer.parseInt(url.substring(i + 1, i + 3), 16);
                } catch (NumberFormatException e) {
                    throw ex;
                }
                if (d > 255 || d < 0) {
                    throw ex;
                }
                buf.add(new Byte((byte)d));
                i += 2;
            } else if (url.charAt(i) == '+') {
                buf.add(new Byte((byte)' '));
} else {
                buf.add(new Byte((byte) url.charAt(i)));
            }
        }
        try {
            byte[] dcd = new byte[buf.size()];
            for (int j = 0; j < dcd.length; j++) {
                dcd[j] = buf.elementAt(j);
            }
            decoded = new String(dcd, "ISO-8859-1");
        } catch (UnsupportedEncodingException e) {
            Logger.getLogger(FormValidator.class.getName()).log(Level.SEVERE, null,e);
            throw ex;
        }
        return decoded;
    }
}
Leave a Comment

Webmail Overview

WebMail is a system that allows users to submit Email requests from a web form. It then will process user inputs and communicate with corresponding SMTP servers to deliver mails.The administrator of the system can configure the port number on which the WebMail server will be monitoring, as well as the hosting directory for the WebServer sub-module.

The system is mainly divided into three modules: the web server module, the mail deliver module and the scheduler module.

The web server module listens on a certain port, waiting for users’ requests from web browsers. It responds with corresponding pages like ‘new email’ page or status page.

The mail deliver module communicates with a SMTP server and deliver users’ Emails to these servers, and returns with a status code showing what the deliver result should be.

The scheduler determines when to deliver an Email since the user may schedule a future Email instead of sending it right away. It also generates the status page for the web server.

Leave a Comment

CrazyBus Launch Script

#!/bin/bash

PREFIX=
if [ -L "$0" ]; then
    PREFIX=`readlink -f $0`
    if [ $? -eq 0 ]; then
        PREFIX=`dirname $PREFIX`        
    else 
            PREFIX=`file $0`
            PREFIX=${PREFIX##*symbolic link to }
            PREFIX=`dirname $PREFIX`
    fi
else

PREFIX=`dirname $0`
fi

case $PREFIX in
        /*)
        ;;
        *)
        cd $PREFIX
        PREFIX=`pwd`
        ;;
esac

cp=
for i in $PREFIX/lib/*.jar; do
        cp=$i:$cp
done


$PREFIX/java/bin/java \
-Djava.library.path=$PREFIX/swt -classpath $cp \
org.crazybus.login.Login  &
Leave a Comment

Collage

Collage is a little game that let users to rearrange pictures according to the given order. The main logic is as follows:

void canvasFrame::OnLButtonDown(UINT nFlags, CPoint point) 
{
    CClientDC dc(this);
    xx = yy = -1;

    //判断鼠标点击的位置
    if(point.x > 0 && point.x < 100)
    {

if(point.y > 0 && point.y < 100)
        {
            xx = 0;
            yy = 0;
        }
        if(point.y > 100 && point.y < 200)
        {
            xx = 1;
            yy = 0;
        }
        if(point.y > 200 && point.y < 300)
        {
            xx = 2;
            yy = 0;
        }
    }
    if(point.x > 100 && point.x < 200)
    {
        if(point.y >
0 && point.y < 100)
        {
            xx = 0;
            yy = 1;
        }
        if(point.y > 100 && point.y < 200)
        {
            xx = 1;
            yy = 1;
        }
        if(point.y > 200 && point.y < 300)
        {
            xx = 2;
            yy = 1;
        }
    }
    if(point.x > 200 && point.x < 300)
    {
        if(point.y > 0 && point.y <
100)
        {
            xx = 0;
            yy = 2;
        }
        if(point.y > 100 && point.y < 200)
        {
            xx = 1;
            yy = 2;
        }
        if(point.y > 200 && point.y < 300)
        {
            xx = 2;
            yy = 2;
        }
    }

    int xxx, yyy;
    if(xx != -1 && yy != -1)
    {
        for(int i = 0; i < 3; ++i)
        {

for(int j = 0; j < 3; ++j)
            {
                if(cur[i][j] == 9)
                {
                    xxx = i;
                    yyy = j;
                }
            }
        }
    }

    if(abs(xxx - xx) + abs(yyy - yy) == 1)
    {
        //dc.TextOut(400, 400 ,"hello!");
        //int t = cur[xxx][yyy];
        cur[xxx][yyy] = cur[xx][yy];
        cur[xx][yy] = 9;

    //交换图片位置
        mdc->SelectObject(b);
        dc.BitBlt(a[xx * 3 + yy].x, a[xx * 3 + yy].y, 100, 100, mdc, 0, 0, SRCCOPY);

        switch(cur[xxx][yyy])
        {
            case 1: mdc->SelectObject(p1);break;
            case 2: mdc->SelectObject(p2);break;
            case 3: mdc->SelectObject(p3);break;
            case 4: mdc->SelectObject(p4);break;
            case 5: mdc->SelectObject(p5);break;

    case 6: mdc->SelectObject(p6);break;
            case 7: mdc->SelectObject(p7);break;
            case 8: mdc->SelectObject(p8);break;
        }
        dc.BitBlt(a[xxx * 3 + yyy].x, a[xxx * 3 + yyy].y, 100, 100, mdc, 0, 0, SRCCOPY);

        int f = 0;
        for(int i = 0; i < 3; ++i)
        {
            int flag = 0;
            for(int j = 0; j < 3; ++j)
            {
                if(cur[i][j] != 3 * i + j + 1)

    {
                    flag = 1;
                    break;
                }
            }
            if(flag == 1)
            {
                f = 1;
                break;
            }
        }
        if(f == 0)
        {
            strcpy(result,"恭喜你,你赢了!");
            dc.TextOut(100 , 350 ,result);
        }
    }
    CFrameWnd::OnLButtonDown(nFlags,
    point);
}


Leave a Comment

ISP Demo Overview

ISP Demo is a demonstration of how an Internet Service Provider should work using four Cisco routers (one Cisco 2514 and three Cisco 2501), three HP 2524 switches, several laptops and PCMCIA cardd, and some UTP straight and crossed cables.

In this project, a small ISP is set up to achieve dynamic IP routing, IP multicast routing and fault-tolerant IP routing. The ISP provides basic services like DHCP, DNS, WWW web service, Email service and VPN.

OSPF is used as the internal routing protocol for our network, since it has a better convergence time than RIP and consume far less network ressources. There is a static route to the VPN network through the VPN server. OSPF has to handle this and redistribute (redistribute static subnets under the OSPF con figuration) the static routes. OSPF is run only between the routers and all ethernet interfaces are passive.

The web server is a simple Apache2 server on a dedicated computer running Ubuntu 9.04, without any SQL databases or any scripting languages. On this server there is ISP’s home page and the whole documentation. The web server can also be used to put some news to inform the clients if there are problems in the network.

We used Sendmail (version 8.13) to confi gure the MTA and Dovecot as the MDA. SendMail has been chosen because it’s a widely used software, very modular and allows extensions to threat spam and viruses. This server can handle a huge load, and while it is hard to con figure, it works well when con figured.

The VPN server is an OpenVPN server running on debian. We chose OpenVPN because it runs on Windows, Linux, BSD and Solaris hosts, and there are also clients for Mac OS X. Furthermore, it uses only one TCP or UDP port, not like PPTP which uses GRE protocol and may be blocked by the firewall of the remote network (the physical network our client is connecting to).

PIM-SM (Protocol Independant Multicast – Sparse Mode) is used to set up multicast routing.

*Note: some of the contents above are from the final documentation we wrote as a team, which consisted of seven other students in KTH.*

Leave a Comment

Test plan

1.Introduction

In this project we implemented an Olympic medal tracking system; its basic requirements are included in Functional Requirements and Project Plan. For more details, please refer to the two documentations mentioned above.

Testing for this system is relatively easy for the following reasons:

  1. The functions required by the customer are simple and basic.
  2. The customer does not place scalability at an important position.

However, testing is still important because we can not guarantee the system to function well according to the requirements. Furthermore, even if the customer does not place performance of the system at first place, it is still essential that our system will respond within the time one user could bare.

2. Testing Staff

StaffResponsibilities
Song ShaoyiMake test plan, Functional test
Mei XiaoweiUser interface test
Li BoqiangPerformance test

3. Test Cases

Case #

Module

Pre-condition

Action

Expected result

1

Login

On login page. User is not logged in.

Type in an invalid username/password and press “Login”

An error message of “Invalid username or password” is displayed in red on login page.

2

Login

On login page. User is not logged in.

Type in an correct username/password and press “Login”

Display admin functions on the top of the page, including login out link.

3

Login

On login page. User is logged in.

Whether require user login again

No further requirement for relogin.

4

Log off

On any page. User is logged in.

Click on link “logoff”.

Admin functions on top of the page disappear and display “login” function link.

5

Search

On search main page. User logged in.

Click on link “Search by date(s)”.

Go to search by date page.

6

Search

On search main page. User not logged in.

Click on link “Search by date(s)”.

Go to search by date page.

7

Search

On search main page.

Click on link “Search by event(s)”.

Go to search by event
page.

8

Search

On search main page.

Click on link “Search by
country(s)”.

Go to search by country page.

9

Search

On search main
page.

Click on link “Search by athlete(s)”.

Go to search by athlete page.

10

Search

On index page.

Click on link “Search by date(s)”.

Go to search by date page.

11

Search

On index page.

Click on link “Search by event(s)”.

Go to search by event page.

12

Search

On index page.

Click on link “Search by country(s)”.

Go to search by country page.

13

Search

On index page.

Click on link “Search by athlete(s)”.

Go to search by athlete
page.

14

Search

On index page.

Click on link “country name”.

Go to search results of medals the country won.

15

Search

On index page.

Click on link “athlete name”.

Go to search results of medals the athlete won.

16

Search

On index page.

Enter a valid country name in “country field”, Click on link “search”.

Go to search results of medals the country won.

17

Search

On index page.

Enter an invalid country name in “country field”, Click on link “search”.

Show no such country error message.

18

Search

On index page.

Enter a valid country name in “athlete field”, and enter athlete name in “athlete field”, Click on link “search”.

Go to search results of medals the country won.

19

Search

On index page.

Enter an invalid country name in “athlete field”, and enter athlete name in “athlete field”, Click on link “search”.

Show no such country error message.

20

Search

On index page.

Enter a valid country name in “athlete field”, and enter athlete name in “athlete field”, Click on link “search”.

Go to search results of medals the country won.

21

Search

On index page.

Enter a valid athlete name in “athlete field”, Click on link “search”.

Go to search results of medals the athlete won.

22

Search

On index page.

Enter an invalid athlete name in “athlete field”, Click on link “search”.

Show no such athlete error message.

23

Search

On search result page.

Click on link “athlete name”.

Go to search results of medals the athlete won.

24

Search

On search result page.

Click on link “country name”.

Go to search results of medals the country won.

25

Search

On search result page.

Click on link “rank by date”.

Rank search results by
date.

26

Search

On search result page.

Click on link “rank by
event”.

Rank search results by event.

27

Ranking

On index
page.

Click on link “gold”

Rank countries by number of gold medals.

28

Ranking

On index page.

Click on link “total”

Rank countries by number of total medals.

29

Ranking

On search result page.

Click on link “Search by date(s)”.

Rank the results by date.

30

Ranking

On search result page.

Click on link “Search by event(s)”.

Rank the results by event.

31

Admin

On management page. User is logged in.

Click on link “add”

Jump to add medal page.

32

Admin

On management page. User is logged in.

Click on link “correct”

Jump to correct medal confirm page.

33

Admin

On correct medal confirm page. User is logged
in.

Click on link “confirm”

Jump to delete medal information page.

34

Admin

On correct medal confirm page. User is logged in.

Click on link “cancel”

Jump to admin default page.

35

Admin

On management page. User is logged in.

Click on link “delete”

Jump to delete medal confirm page.

36

Admin

On delete medal confirm page. User is logged in.

Click on link “confirm”

Jump to delete medal information page.

37

Admin

On delete medal confirm page. User is logged in.

Click on link “cancel”

Jump to admin default page.

4. Performance and UI tes

It is essential that our system will respond within the time one user could bare, and the user interface should be nice as well. So testing of performance should be measured by the testers’ comparison between our system and existing systems.

Leave a Comment

Functional requirements

1. Features

1) For general users

a) Simulation of a simple Olympic medal tracking system.
b) The system should allow general users to access the medal tracker pages without requiring them to login. They should be able to see the number of medals (broken down to gold, silver, bronze, and total) won by each country in a sorted list. Users should be able to sort by gold medals and total medals.
c) The system should also enable general users to go to any particular country and check the number of medals the country has collected in each event.
d) Finally a user can go to any athlete and find out the number of medal(s) won by this athlete, broken down by events.
2) For the administrator

a) The system should have admin login functionality for the administrator to input and correct the data.
b) Once an administrator logs into the admin account, the system should provide the capabilities of assigning and removing a medal from any country for any event by any athlete.
c) The system needs to give admin user an option to logoff.
d) Without requiring them to login, the system should also allow general users to access the medal tracker pages. They should be able to see the number of medals (broken down to gold, silver, bronze, and total) won by each country in a sorted list. Users should be able to sort by gold medals and total medals.
e) The system should also enable general users to go to any particular country and check the number of medals the country has collected in each event.
f) Finally a user can go to any athlete and find out the number of medal(s) won by this athlete, broken down by events.
2. Performance

1. The default page for general users should be a rank by gold medals.
2. Web pages should display well in IE version 6.0 or above.
3. Login link for the administrator should be obvious on page.
4. Languages displayed on pages can be decided by the team, English and Chinese are both OK.
5. Scalability is not an important issue.
6. Search function should be obvious and user-friendly.
7. The web page should be free of advertisements.
3. Speed

There are no speed requirements; but the system should respond within the time a regular user could stand.

4. Use cases


Leave a Comment

Exploring the Performance of MD5: Efficiency and Security

In this project, we explored the performance of the popular hash function MD5 — Message Digest Algorithm Version 5. Firstly we introduce the algorithm in detail. Then we check the algorithm’s complexity in two aspects: computational and space complexity. Furthermore we check the security aspects of MD5: whether it is feasible to find collision it using brute force, birthday attack, and cryptanalysis. Available cryptanalysis methods are introduced so that we can find out why MD5 is not considered secure any more.

The computational complexity of MD5 can be seen from the following diagram:

The bash script used to generate the above diagram is as follows:

#!/bin/sh
# Date:   Nov. 28th, 2009
# Usage:  ./timemd5.sh Directory_Name

USAGE='Usage: ./timemd5.sh Directory_Name'

if [ $# != 1 ]
then
    echo $USAGE
    exit
fi

if [ -d $1 ]
then
    DICTORY=$1
else
    echo $USAGE
    exit
fi

# Create a statics file
DATE=`date +%Y%m%d%H%M%S%N`
STATICS="$HOME/statics.$DATE"
if [ ! -e "$STATICS"]
then
    touch "$STATICS"
fi
cat /dev/null >$STATICS

cd $DICTORY

# For each file in the directory, 
# compute its MD5 value with 'md5sum'.
# And record the file size and the time
# it takes to compute its MD5 hash.
find $PWD -iname "*" |\
while read i
do
    if [ -f "$i" ]
    then
        echo "Calculating MD5 for: $i"
        SIZE=`du -m "$i" |cut -f1`
        (time -f "%e" -o /tmp/time md5sum \
         "$i")1> /dev/null
        TIME=`cat /tmp/time`
        echo "$SIZE\t\t$TIME" >>$STATICS
    fi
done

rm /tmp/time
echo "Size\t\tTime"
cat $STATICS

# Draw a more straightforward graph
# using 'gnuplot'
cd $HOME
GNUPLOTFILE="plot"
echo "set terminal postscript eps 22" \
      >$GNUPLOTFILE
echo "set output \"graph.eps\"" \
      >>$GNUPLOTFILE
echo "set key left top Left" \
      >>$GNUPLOTFILE
echo "setxlabel \"File Size (M)\"" \
      >>$GNUPLOTFILE
echo "set ylabel \"Processing Time (s)\"" \
      >>$GNUPLOTFILE
echo "plot [0:1500][0:50] \""$STATICS"\" \
      with points ps 1 pt 7 title \"\"" \
      >>$GNUPLOTFILE
gnuplot <$GNUPLOTFILE

evince graph.eps&

#rm $GNUPLOTFILE
#rm $STATICS
echo "Task done!"

exit

One Comment

使用Oracle Job实现定时向管理员发送信息

1.构造实现功能(发送消息)的存储过程:

CREATE OR REPLACE PROCEDURE "ADMIN"."SEND_EMP_BIRTHDAY_MSG" is
 cursor emp_cursoris
 select eid, ename
 from admin.employee
 where to_char(sysdate, 'mm-dd') = to_char(birthdate, 'mm-dd');
eid number(5);
 ename varchar2(20);
 msgdesc varchar2(3000);
begin
 msgdesc := '';
 for rname in emp_cursor loop
 msgdesc := msgdesc || '\n员工编号: ' || rname.eid
|| ' 员工姓名: ' || rname.ename;
 end loop;
 if length(msgdesc) > 0
 then
 msgdesc := '今天是以下员工的生日:\n' || msgdesc;
insert into admin.messagevalues(admin.msgid_sequence.nextval,
sysdate, '系统提示', 'admin', msgdesc, 1, 1, 0);
dbms_output.put_line(msgdesc);
end if;
dbms_output.put_line(msgdesc);
end;

2.创建JOB

variable job1 number;
begin
dbms_job.submit(:job1,'send_emp_birthday_msg;',sysdate,'sysdate+1');
--每天运行send_emp_birthday_msg过程一次
end;

3. 运行JOB

begin
dbms_job.run(:job1);
end;
Leave a Comment

每隔一定时间间隔查询是否有新消息

/**
 * 查询信息
 */
public void checkMessage(){
    TimerTask tt = new TimerTask() {
        public void run() {
            String unreadMsgNo = new CheckMessage().getUnreadMsgNo
                                    (URL, USER,
PASSWORD);
            if(unreadMsgNo.equals("0")){
                jLabelMsgTip.setText("您没有新信息!");
            } else{
                jLabelMsgTip.setText("您有" + unreadMsgNo + "条新信息!");
            }
        }
    };
    Timer t = new Timer();
    t.schedule(tt, 0, (long)1000*15);//每隔15秒执行一次
}
Leave a Comment

Oracle VPD策略实现行级安全性

VPD 即Virtual Private Databases,提供了对数据库的精密访问控制 (graind access control (FGAC) ),使用VPD,可以在数据记录集定义用户的访问权限。

通过VPD 策略,相当于用户操作数据库中的数据时隐式添加一些条件。比如我们要实现特定角色只能操作数据库表中的特定行的数据,这就可以用 VPD 策略实现。现在以车队长只能操作员工表中的属于他的车队的员工的数据信息为例具体说明:

1. 构造策略函数:

CREATE OR REPLACE FUNCTION "VPD"."FUN_MOTORCADE" (
 p_schema in varchar2, p_table in varchar2
)
return varchar2
as
 l_retstr varchar2(100);
 eid number(5, 0);
 did number(5, 0);
begin
 if lower(user)<> 'admin'
 then
 l_retstr := null;
 for user_rec in
 (
 select eid, did
 from dpmanager
 where loginname = lower(user)
 ) loop
 eid := user_rec.eid;
 did := user_rec.did;
 end loop;
 l_retstr := 'did = ' || did ;--|| 'eid = ' || eid;
 return l_retstr;
 else
 l_retstr := null;
 return l_retstr;
 end if;
end;

2. 授予执行策略函数的权限:

grant execute on FUN_MOTORCADE to public;

3. 向数据库表添加策略:

Begin
Dbms_Rls.Add_Policy(
Object_Schema =>'admin', --数据表(或视图)所在的Schema名称
Object_Name =>'employee', --数据表(或视图)的名称
Policy_Name =>'motorcade_ply', --POLICY的名称,主要用于将来对Policy的管理
Function_Schema =>'vpd', --返回Where子句的函数所在Schema名称
Policy_Function =>'fun_motorcade', --返回Where子句的函数名称
Statement_Types =>'Select,Insert,Update,Delete', --要使用该Policy的DML类型,如'Select,Insert,Update,Delete'
Update_Check =>True, --仅适用于Statement_Type为'Insert,Update',值为'True'或'False'
Enable =>True --是否启用,值为'True'或'False'
);
end;

最开始不明白策略函数的作用,花了好几天上网查资料才知道原来函数的返回值便是你想往表上加的隐式约束。
比如,你向EMP表添加了下面的策略函数:


CREATE OR REPLACE FUNCTION "VPD"."TEST" (
 p_schema in varchar2, p_table in varchar2
)
return varchar2
as
 l_retstr varchar2(100);
begin
  if user = ‘admin’
 then
 l_retstr := ‘1 = 1’;
 else
 l_retstr := ‘1 = 2’;
 end if;
 return l_retstr;
end;

现在,如果你以admin身份登录执行 ‘SELECT * FROM EMP’ , 则实际执行的是 ‘SELECT * FROM EMP WHERE 1 = 1’ , 其中 ‘1 = 1’ 这个条件是策略函数的返回值;如果你以其他身份登录执行 ‘SELECT * FROM EMP’ , 则实际执行的是 ‘SELECT * FROM EMP WHERE 1 = 2’ 。

Leave a Comment

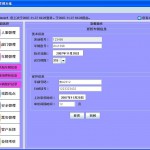
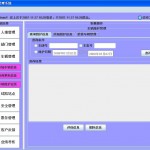
CrazyBus Overview

CrazyBus public transport management system is a system used to help public transport companies manage their daily affairs. The system contains several modules including employee management, department management, bus management, line and bus stop management and lookup, business achievement management, accident management, user management, ticket management, IC card management, and so on.

It contains a Client/Server (C/S) system written in Java, and a Browser/Server (B/S) system written in JSP. The C/S module handles all the management tasks, while the B/S system handles users’ lookup requests and feedbacks and so on. The system uses Oracle 9i as database management system.

Leave a Comment